In this article, you will learn what are the different types of marking tools? How to use them? explained with Pictures.
In addition, you can also download the PDF file of this article at the end of it.
Marking Tools
Engineering professionals can determine an object’s proper development from its markings and how it has been used. The marking process is an important step that can never be left behind while developing an item.
A project that is measured and mismarked may result in waste materials and mistakes. In order to mark properly and correctly according to the required dimensions, different types of marking tools are used.
Generally, marking tools are used to mark a workpiece to obtain accurate size and shape. As a first step, we should use marking media on the workpiece before using the marking tool. This will enable us to see clearly while marking the workpiece.
Read Also: Checkout 16 Different Types of Measuring Tools & Their Uses
Factors for the Exact Marking
For doing any new job, it is necessary to have correct marking according to its blueprint or drawing. If the marking is not exact, the job will not be done according to the drawing measurements.
We can well imagine the difficulty of using a machine part made with wrong measurements. A lot of time is wasted in fitting the wrong part. For exact making, the following important points should be kept in mind:
- Before marking, the drawing of the job should be carefully read.
- While reading the drawing, its measurement should be carefully noted.
- According to the measurement, the required tools should be kept ready in advance.
- Only correct and genuine tools should be used for marking.
- Before making the marking permanent through dot-punching, the marking lines should be checked once again.
- The place at which drilling is to be done should be marked with a center punch.
- For the different kinds of workpieces, different types of marking tools are required.
Read Also: Definitions & Terms Applicable to Mechanical Measurements
Types of Marking Tools
The following are used for different markings, according to drawings:
- Marking table
- Pencil
- Surface plate
- Angle plate
- Odd leg caliper
- Divider
- Scriber
- Surface gauge
- Universal surface gauge
- Try square
- Trammel
- “V” block
- Center punch
- Prick punch
- Combination set
- Parallels
- Bevel square
- Mortise gauge
#1 Marking Table
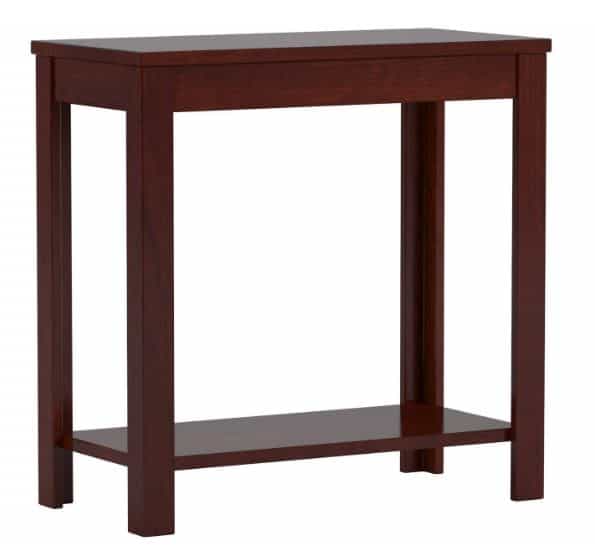
A marking table is a special marking out table which is often used in almost all workshops for doing marking jobs. It is usually made of closed-grain cast iron and has been given a special heat treatment to provide better rigidity for the table.
Marking tables can be available in many shapes, with rectangular and circular being common. Its breadth is from 4′ to 5′, and its length is 6′ to 10′. The upper part of the table is usually made plain on which work and marking tools are placed.
This table is used for simple and routine marking jobs where common tools are used. In addition, it is also used for punching and chipping jobs.
#2 Pencil
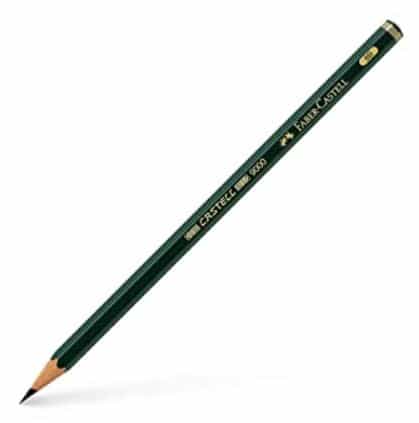
Pencils are writing utensils with graphite leads embedded in wooden shafts. A pencil is one of the most commonly used marking tools, as it can be easily cleaned. It is mainly used for stenography, notes, and artistic sketching and drawing.
When using it, it is best to sharpen it very lightly to give thin, light lines that will not engrave the workpiece. The benefits of this marking tool include ease of use as well as the ability to erase what you’ve drawn.
#3 Surface Plate
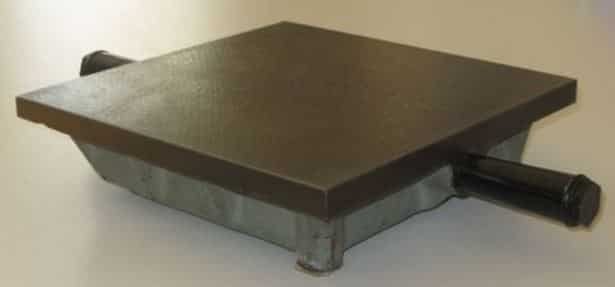
A surface plate is used for jobs that require exact marking. The surface plate is either rectangular or circular, just like the marking table. These plates are made of close grain-cast iron and are kept outside for at least a year for seasoning purposes.
Their upper surface has a fine finish, which may contain 10% to 20% high spots. For convenience use, there are two handles are provided on opposite sides of the plate. Also, there are ribs on the inside of the plates, which make them stronger.
Considerable care is required for making surface plate. After molding and seasoning, it is cut or scratched on the planner machine according to the size. Its surface is almost leveled, and through scraping, it gives its true form.
Uses of Surface Plate
- To measure the smoothness of the job with the main surface of the surface plate.
- To measure the right of a job.
- Used to measure or mark the angle of a job with the help of a sine bar.
- To measure a job with a Dial Test Indicator.
#4 Angle Plate
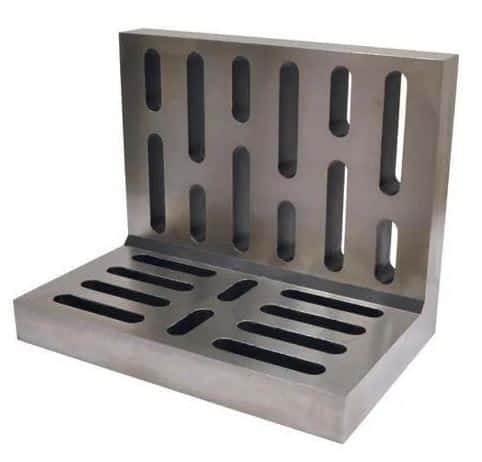
The primary purpose of angle plates is to keep the work parallel and at right angles to the surface. Angle plate is made of good cast iron. It is built at a 90° angle and has rectangular grooves. Both of its outer surfaces have been precisely employed by the scraper.
The angle plate helps support the work from behind when measuring. For marking heavy works, nuts are bolted into their grooves and machined or fastened to angle plates for other machining activities. These plates are found in various sizes ranging in number from 1 to 10.
There are two types of angle plates, big and small size, which are mentioned below.
a) Fixed Angle Plate
It is used to support the work at right angles. The job is fixed on it to do other machining activities.
b) Adjustable Angle Plate
It is used for doing angular marking or measurement.
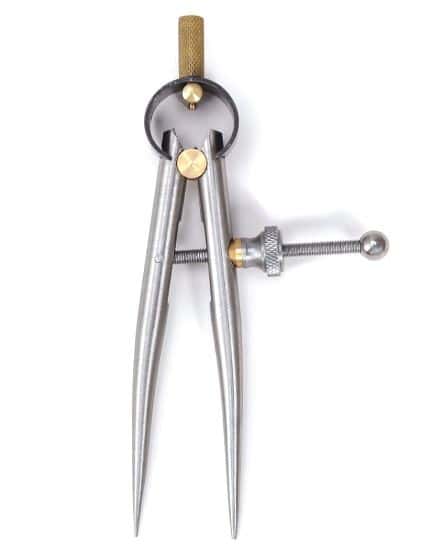
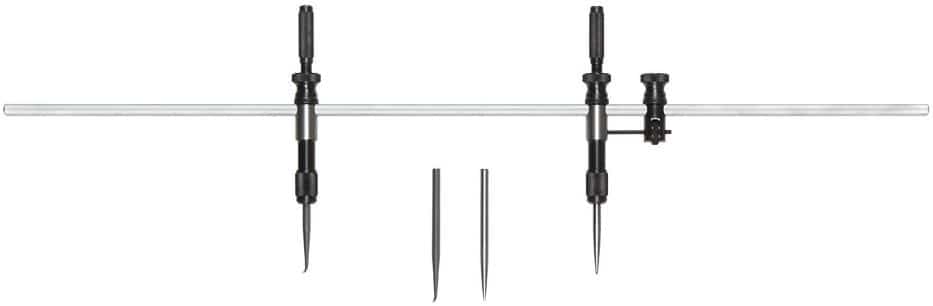
#5 Odd Leg Caliper
This marking tool is also known as Jenny Caliper or Hermaphrodite Caliper. These tools assist in inscribing parallel marks on metal or plastic. It usually has two legs with different purposes. It has one leg straight, which is a guiding edge, and the other is a scribe point that is bent inward about 1/8″ to 1/4″.
Both legs are joined with a rivet or a spring. With a little pressure, we can increase or decrease the distance between these two legs. These are made of mild steel, and their points are case-hardened. According to their makeup, these are of the following two types.
a) Fixed-point Odd Leg Caliper
This type of caliper is shown in the figure. The Working leg of this caliper remains fixed.
b) Adjustable Point Odd Leg Caliper
This type of caliper is shown in the figure. One end of this working leg is fitted with a screw and a nut. This point is made of tool steel wire. That is why it does not wear out easily in marking. It can be adjusted according to the user’s needs. In case it becomes unserviceable, it can be changed.
Uses of Odd Leg Caliper
- It is mostly used for marking a job.
- These calipers are widely used to find out the center of a round job.
- It is used in place of surface gauge in job marking.
Read Also: Types of Metals: Their Properties and Applications [Explained]
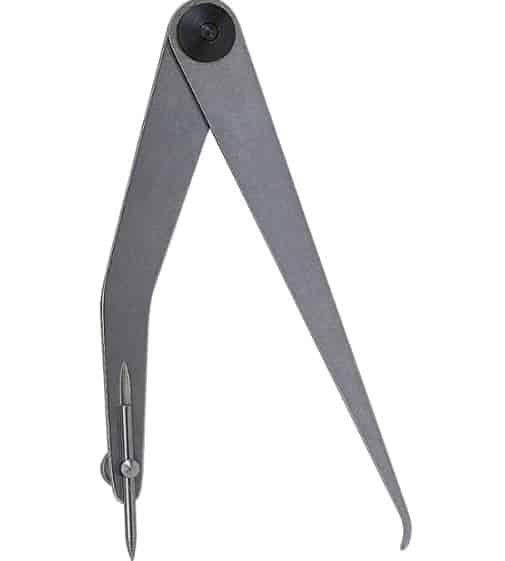
#6 Divider
It is a marking tool used to draw circles, segments, and other geometrical textures. Using a divider, you can easily divide a line into equal parts and make them. These are generally made of mild steel.
Its pointed ends are case-hardened so that they do not wear out easily. A divider can be classified based on how many marks it can open. On the basis of a combination of their legs, they are classified into two parts.
a) Firm Joint-dividers
In this type of divider, their legs are joined by a rivet and washer at the top. But the rivet is not fixed tightly so that its legs can be opened easily.
b) Spring Joint-divider
In this type, both the legs of the divider are tightened on a pin with a spring. Their legs are also joined with each other by an extra screw and split nut. The legs can be easily opened or closed as required by moving its nut.
Uses of Divider
- It is mainly used to measure the distance between two points.
- Used to mark circles and arcs on metal jobs.
#7 Scriber
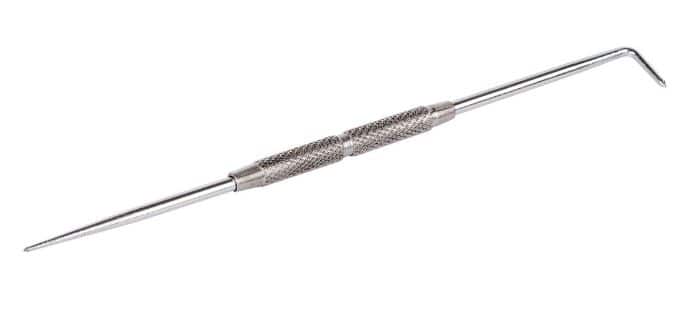
It is a widely used workshop or fitting shop to help mark a line on a material. A scriber is generally made of steel or carbon steel wire of 3mm to 5mm, whose one end is straight and the other is bent at about 90° angles.
It is used along with engineer square, steel rule, and straight gauge. A scriber should always be slanted in the direction of the movement, and the steel rule must be moved with the appropriate pressure. Its length varies from 150mm to 300mm.
Both ends of the scriber are pointed. If it is not in use, a cork or cloth should be placed so that its point does not hurt our fingers.
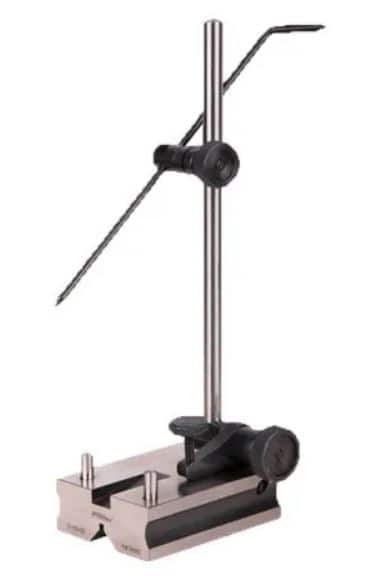
#8 Surface Gauge
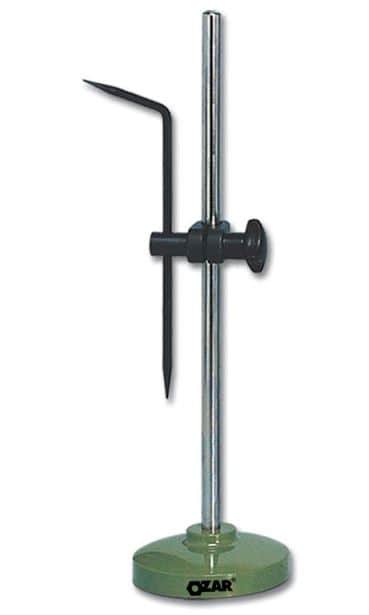
A surface gauge is used to draw a line of layout work by placing it on a surface plate. It is also known as a marking block or scribing block. In ordinary jobs, you can mark with the scribber and odd leg caliper, but for drawing parallel lines, surface gauges are used. These are of the following two types.
a) Solid Surface Gauge
Initially, this type of gauge was used for accurate markings. It was built on a solid base with a rod in the center. The scriber was fixed by fitting a snug bolt in the gauge pillar. For making use of it, it is adjusted with hand and drawn near the steel rule.
#9 Universal Surface Gauge
Universal surface gauges were created and used for precise marking in a short time and without difficulty. Its base is made of good cast iron in a rectangular form. It is slotted in a “V” shape throughout its length.
On the upper surface of its base, two guide pins are fixed. These pins are used for marking on a machined surface, like an odd leg caliper, for affixing. Because of the “V” shaped slots, this does not stick to the surface plate. Thus, it can be easily pushed ahead or pulled backward.
Also, this dirt and grime of the surface plate do not affect the marking because that dirt can be transferred to the slots. Universal surface gauge is not only used for drawing lines on vertical surfaces.
#10 Try Square

A tri square is a woodworking tool used to mark and check 90° angles on pieces of wood. It is commonly used to draw vertical lines on the workpiece. Among the many types of squares woodworkers use, the try square is considered one of the most essential.
By using a try square, you can ensure that the paths are parallel and draw lines at right angles to the edges. A try square brass front with a steel blade riveted into the wood stock.
Uses of Try Square
- It is used to check the surface’s flatness.
- To check the angle of 90°, the try square is widely used.
- It is used to mark vertical lines on the edge of the job.
Read Also: 12 Different Types of Spanners [When & How To Use Them]
#11 Trammel
The trammel is almost similar to a divider. A trammel is used for drawing or marking a circle or parallel lines. It has a round or square rod, which is called a trammel bar or beams. There are two movable trams on the beam.
This can also be used as an inside or outside caliper by fixing points of different types. The beam is generally 15mm to 50mm in length. In other types of trammels, the graduation is indicated in millimeters. For extraordinary big jobs, additional beams are also attached.
#12 “V” Block
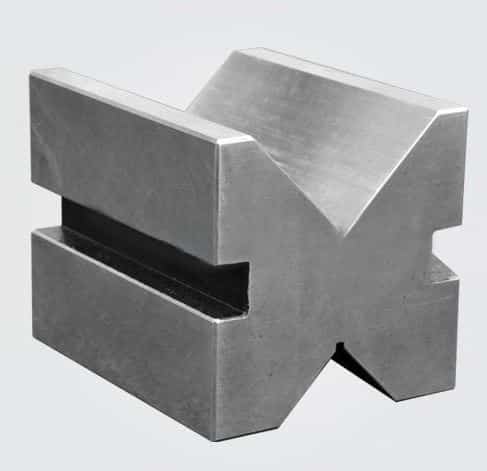
For marking on a round or rectangular job, “V” blocks are used to clamp it. V’ blocks are often made of hardened steel or cast iron, found in different sizes. With its help, drilling, punching, and other machining operations are performed easily on such works.
These marking tools are made of cast iron or steel. Its surface is well-machined and ground. A “V” shaped slot is made in the center with 90° angles on either side. On the remaining two sides, rectangular grooves are formed where the clamp is fixed. These are generally of the following three types and are available in pairs.
a) Simple “V” Block
This is a rectangular block that has a “V” shaped groove on its upper surface. Heavy round jobs are kept over it for marking or machining. There is no provision to clamp the job since, because of the heavy weight of the job, it remains fixed.
b) Clamping “V” Block

It is also a rectangular block. A “V” shaped groove is cut on the two surfaces facing each other, and rectangular grooves are cut on the remaining two surfaces to which the clamp is fixed.
Job is kept on the “V” groove, and the clamp is fixed with the clamping screw. Its distinct feature is that while carrying out any operation on a round job, the job does not move or shake.
c) Magnetic “V” Block
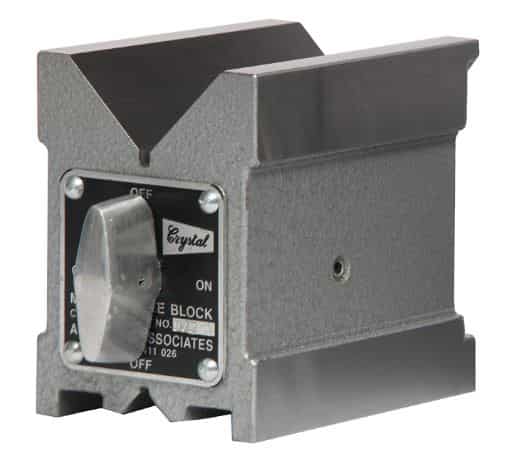
This “V” block looks like an ordinary “V” block, in which the provision of magnetic power is made. Because of the magnetic effect, the job remains stuck to the block. A switch is provided to start or put off the magnetic effect. When we put the switch in the “ON” position, the work gets trapped in the block, and the magnetic effect ceases in the “OFF” position.
#13 Centre Punch
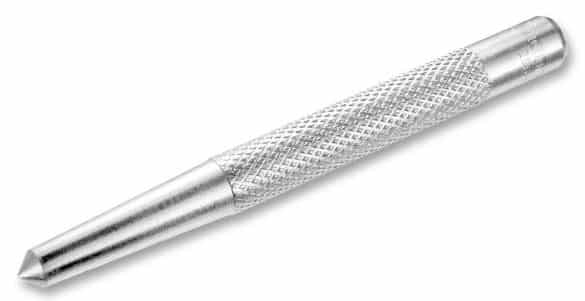
The punch is made of high-carbon steel with hardening and tempering treatment. The point of these is grind at an angle of about 90° and the handling part is knurled. its length is from 35mm to 125mm, and its width is from 4 to 12 mm.
A Centre punch is usually used to center the drilling point so that the drill point can rest properly there. If this center is not made by the centre punch, there is a possibility of the point slipping and drilling at the wrong point. Some center punches are automatic, with a striking mechanism built into the handle.
#14 Prick Punch
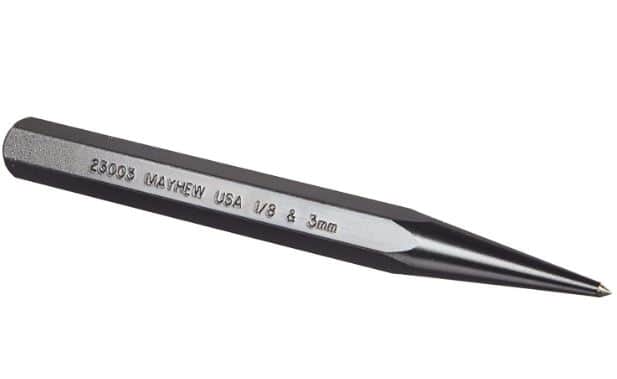
A prick punch is a layout marking tool that is made of carbon steel and has a length of about 100mm to 150mm. Both ends of the punch are made hard and temper. The pointed tip of this punch is ground at an angle of 30° to 60°. These types of marking tools are commonly used to mark jobs of thin metal sheets or to make holes in them.
#15 Combination Set

The combination set is useful in marking and taking measurements. The four main parts of this equipment are steel rule, square head, protractor head, and center head. It is usually made of alloy steel, and its measuring faces are well-ground. Using the protractor head, 1° degree accuracy can be achieved when marking and measuring angles.
Read Also: 37 Types of Clamps [How To Use Guide] Explained in Detail
#16 Parallels
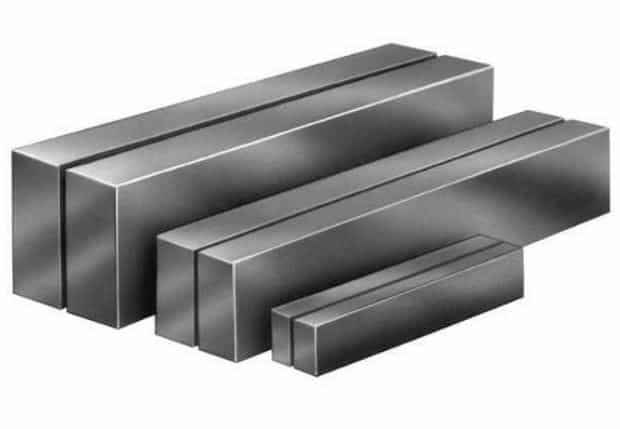
These are square or rectangular rods made of high steel. They have a square surface and are ground in parallel. To make the layout easier, these are used in pairs to raise the work to the right height. In addition, parallels are commonly used to support work when it is in a vice or attached to a machine bed.
#17 Bevel Square
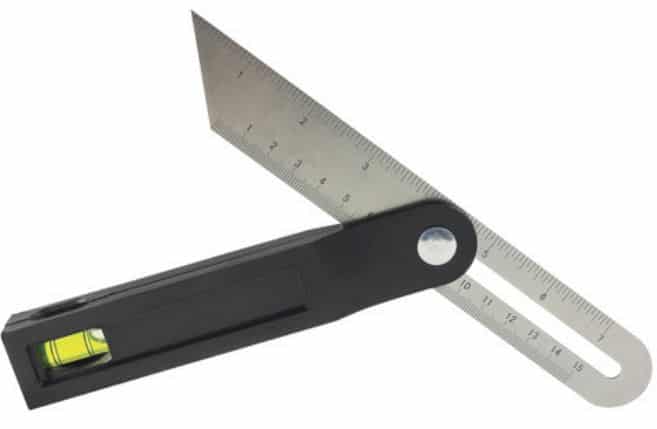
It is a flexible tool used by woodworkers for laying angles and testing the accuracy of work surfaces on slopes. A bevel square is used in fitting shops to measure angles along edges or to test the angle accuracy of oblique surfaces.
These are usually made of steel, and the parallel ends are ground. Some types vary slightly in size but have a blade that can be moved 360° and locked in a fixed position.
#18 Mortise Gauge
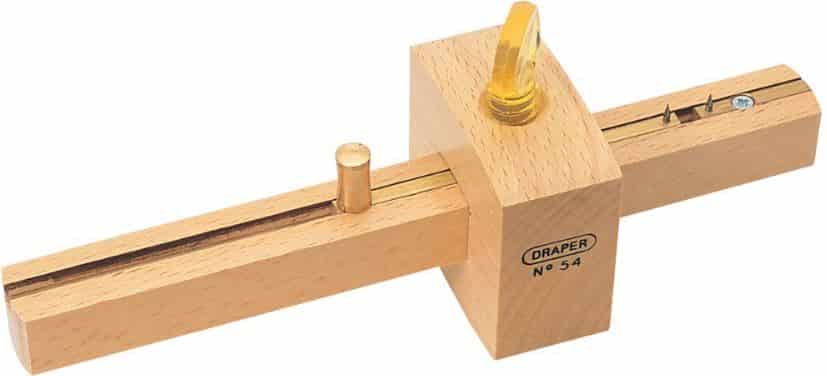
A mortise gauge is an instrument that enables two lines to be scribbled parallel to an edge. These are usually made of hardwood with brass fittings. Essentially, it is composed of two sharp spurs that can be adjusted before marking the workpiece and adjusted by the mortise chisel width. It is a woodworking tool used by a carpenter or joiner.
Read Also: Types of Hammers and Their Applications [with Pictures]
Methods of Marking
Although no specific rules can be framed for marking yet for general marking, the following methods are adopted:
- We should draw a picture of the work that we think is proper to make and understand it.
- Before marking, the two adjacent sides and the job surface must be thoroughly prepared after filling, scraping, and another machining.
- The marking surface should be coated with a thin paste of Persian blue, copper sulfate, or chalk as desired before marking.
- If a surface gauge or vernier gauge is to be used for marking, the job must be placed appropriately on the surface with the angle plate and “V” block.
- While marking, the scriber or punch should be pointed.
- Marking tools should be selected according to the job.
- If you want to make a chop or a circle on the work, then a deep mark should be made in the middle of the work with the help of a center punch. Otherwise, there is a possibility of the divider slipping.
- If drill marking is necessary, we should draw a circle of the same size outside the center and also draw another larger circle from the same center so that we know that the drill is being done at the right place.
- If a line has to come up to a cut or slot, then we should fill this gap with lead, etc.
- For the marking of a circle, four marks should be made on its circumference with a point punch opposite each other.
- After marking as per the drawing, it should be rechecked.
- When the marking is done correctly, it should be made permanent with a dot punch or any other punch, as the case may be. But the other helping lines should be cleared before making the marking permanent.
Closing It Up
That’s it. Thanks for reading. I hope I have covered everything about the “Marking Tools.” If I missed something, or if you have any doubts, let me know in the comments. If you liked this article, please share it with your friends.
Want free PDFs direct to your inbox? Then subscribe to our newsletter.
Download PDF of this article:
You might like to read more in our blog:
Hello, Nice simple article which woukd be very beneficial to newcomers to metalwork.
I would like to point out that Grinding is the utilisation of a grinding wheel to remove metal by abrasion, ie to grind, or is has been ground. There is no such word as Grinded. This is not a critism of your ability to understand the work method but to clarify an explanation. Grind, Ground, Grinding.
Cheers and keep up the good work
Hello! Thanks for the kind words and helpful feedback. I’ll make sure to use the correct terms in future articles. Cheers!
Thanks for the article. Very interesting.
I have just found this web page and will be following your articles.
I have a Maho vintage marking instrument but, I am not sure what it was used for and, I am looking around on the web.
I’m glad you liked our article. You’re welcome. Keep visiting.
This is too fabulous.
Thanks for your feedback.
Muy buena información. Gracias.
You’re welcome.
Your post on automobile engineering is very very useful and knowledgeable. Keep it up. We need more information from you about automobile field. Some posts we couldn’t download via PDF. That make us feel sad. Kindly do favour of us.
Thanks for your feedback. I appreciate your response. I will update articles with PDF files in all posts soon. Keep visiting 😉